20130724
1 cup bread and pizza flour
2 teaspoon baking powder
3/4 cup Japanese sugar
2 ripe bananas
1 egg
30g NZ butter
Few drops of lemon juice
*bake@140 for 70 min and @50 for 5 min*
************************
20130703
1 cup bread and pizza flour
1 teaspoon baking powder (I might forgot to add another one =P)
3/4 cup Japanese sugar
4 ripe bananas
1 beat egg
30g NZ butter
Few drops of lemon juice
*bake@150 for 60 min and @50 for 5 min*
•notes•
I put lots of bananas this time since last time two raw bananas was not flavored enough. Maybe because there was not enough baking powder as well, it came out quite wet, and after it got cool, it turned quite ‘creamy’ – some wet texture that’s hard to explain…
************************
20130617
Latest in front. Haven’t made Banana cake for ages. Since winter is coming too soon, getting too cold, we need something warm and sugar to keep on our life. I’m sure Darling miss my Banana cake too. =P
This time:
1 cup bread and pizza flour
2 teaspoon baking powder
1 cup Japanese sugar
2 raw bananas
1 beat egg
30g NZ butter
Few drops of lemon juice
*bake@170 for 45 min and @50 for 5 min*
•notes•
*Not much banana flavour first, I think it’s because of the raw bananas, or maybe we should try three bananas next time.
*Forgot to buy milk this time, although I add 1/4 cup of water 50ml to the egg, it does not give moist texture. And since bread and pizza flour is too strong, might try more liquid next time.
************************
S在新西兰的时候做过很多次Banana Cake,只是recipe不是Alison Holst的,所以不是很容易找. (Alison Holst是很有名的新西兰厨师?写过一套食谱,后来和她的儿子Simon Holst一起, Mary说,他们的食谱都很可靠,百分百的书上写的和做出来的是一样的,如果自己没有乱来的话 =P)
前些日子T说想吃Banana Cake,简单的蛋糕,又很久没做过了,S就大发慈悲的开始了Banana Cake之旅
第一次–百分百按照网上搜来的recipe,当然也是经过精心挑选的, 因为计量单位的问题,个人感觉的问题,在S多年的baking经验的基础上…选出来的最容易也最可行的一个.细细
材料:
2 Cup – Self-raising flour
1 Cup – sugar
60g – butter
1 teaspoon lemon juice
1/4 Cup – milk
2 eggs
2 bananas (8oz – about 2 medium ones)
Mix dry ingredients first, soften butter in a pot, when it cools down, add milk, egg, lemon juice, mix, and add well-mashed bananas.
Add the wet ingredients to the dry ones, mix well
Line the baking bin with baking paper, and pour the mix to it
Bake @ medium (about 150 – 180 degree) for 1 and 3/4 hours
结果:因为用的是小的Oven。。。还有一些人为失误。烧到一半。。。细细。
第二次 — 由于Oven太小,所以材料减半
材料:
1 Cup – Self-raising flour
1/2 Cup – sugar
30g – butter
few drops – lemon juice
1 egg
1 banana
1/8 Cup – milk
Mix dry ingredients first, soften butter in a pot, when it cools down, add milk, egg, lemon juice, mix, and add well-mashed bananas.
Add the wet ingredients to the dry ones, mix well
Line the baking bin with baking paper, and pour the mix to it
Cover the bin with tin foil in case the cake touch the top
Bake @ medium (about 150 – 180 degree) for 40 minutes
take the tin foil off, and bake for another 5 minutes @ 50 degree
结果:Not bad…but a little bit dry, not sweet enough and T wants more bananas.
第三次 — 多了超市买的香蕉,和糖,因为T说他的糖是天然的,所以没有一般的甜。
材料:
1 Cup – Self-raising flour
1 Cup – sugar
30g – butter
few drops – lemon juice
1 egg
2 bananas
1/8 Cup – milk
Mix dry ingredients first, soften butter in a pot, when it cools down, add milk, egg, lemon juice, mix, and add well-mashed bananas.
Add the wet ingredients to the dry ones, mix well
Line the baking bin with baking paper, and pour the mix to it
Cover the bin with tin foil in case the cake touch the top
Bake @ medium (about 150 – 180 degree) for 40 minutes
take the tin foil off, and bake for another 5 minutes @ 50 degree
结果:甜度差不多了,但是超市买的香蕉比较生。。。在蛋糕里都能吃出香蕉的涩涩的感觉,不好。而且T竟然说还是不够。。。香蕉。。。
第四次 —
材料:在路边的小店挑了比较熟,比较大的两个香蕉。。。
1 Cup – Self-raising flour
1 Cup – sugar
30g – butter
few drops – lemon juice
1 egg
2 banana
1/4 Cup – milk
Mix dry ingredients first, soften butter in a pot, when it cools down, add milk, egg, lemon juice, mix, and add well-mashed bananas.
Add the wet ingredients to the dry ones, mix well
Line the baking bin with baking paper, and pour the mix to it
Cover the bin with tin foil in case the cake touch the top
Bake @ medium (about 150 – 180 degree) for 40 minutes
take the tin foil off, and bake for another 5 minutes @ 50 degree
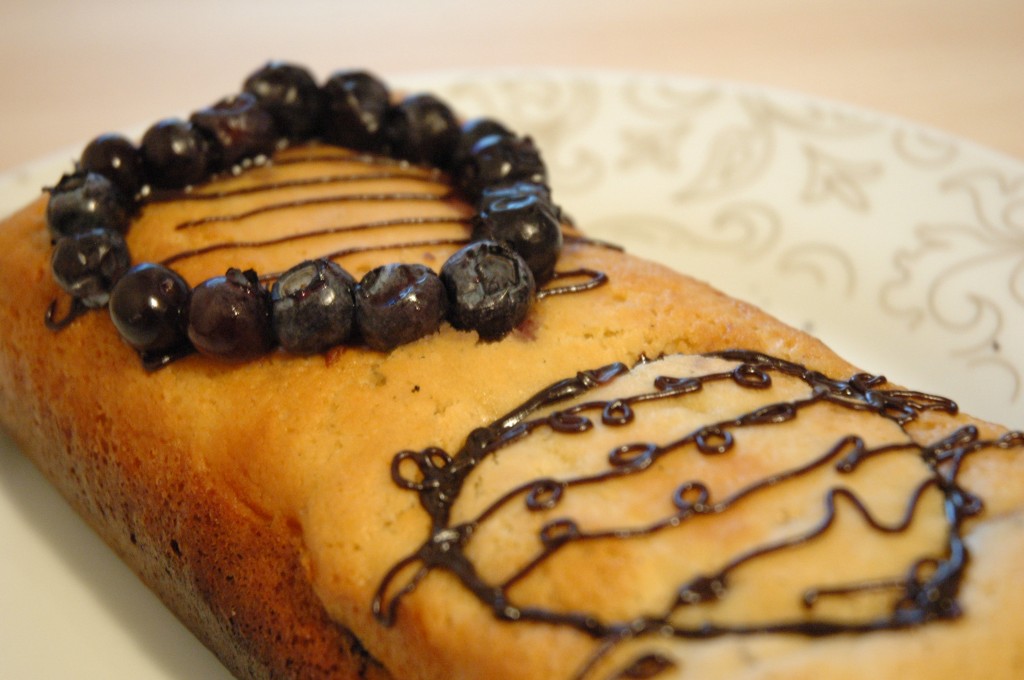
结果:还比较满意,牛奶按个人喜好多放了一点点。蛋糕整体来说比较湿,香蕉很是主角。。。但是蛋糕里的香蕉块有点儿偏紫色。。还有黄色的东西。。估计是鸡蛋没有打开。。。细细。总的来说还是很满意的,而且这样蛋糕比较重的话,凉了之后表面是平的,而不是一般的中间鼓起来的。
@Blogbus 20100206 10:13
 Not crab still, but crab fish cake………..thin slice cucumber with slicerslice red onion with slicer


